手把手教你发布Android库到MavenCentral

前言

最近一则JCenter将要关闭的消息搞得人心惶惶。作为Google默认钦定的开源远程仓库,这么些年估计免费帮Google干活干腻了。抛开两家公司的利益冲突,我们来聊一下对我们开发的影响。我们知道之前有非常多的三方库是托管在Jcenter上的,甚至不少库有可能没有同步到其他远程仓库。一旦JCenter关闭,我们的项目编译甚至都会受到影响。

小提示

万一直到Jencter关闭的时候,项目中有使用到还没来得及迁移的库。我们可以配置一下阿里云的镜像,阿里云镜像会同步各大远程仓库。在根build.gradle添加如下配置:

1
maven {url 'https://maven.aliyun.com/repository/public'}

各大仓库对应的镜像如下表所示

仓库名称 阿里云仓库地址 源地址
mavenCentral https://maven.aliyun.com/repository/central https://repo1.maven.org/maven2/
Jcenter https://maven.aliyun.com/repository/public http://jcenter.bintray.com/
public https://maven.aliyun.com/repository/public central仓和jcenter仓的聚合仓
google https://maven.aliyun.com/repository/google https://maven.google.com/
官方信息

从jFrog官方的说明来看,自2021年3月1号开始,JFrog将不再接受任何新的提交,包括新库的提交和老库的更新。不过之前提交的还是可以继续使用到2022年2月1日。

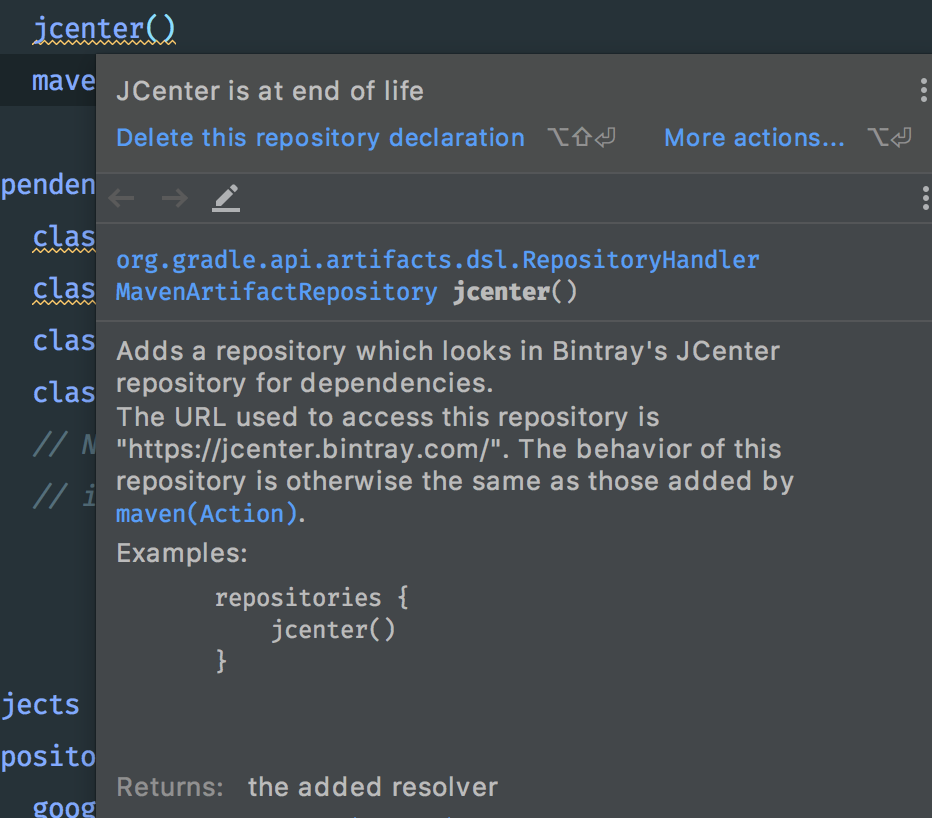
最新版本的Android Studio也提示了JCenter将废弃。
看来情况还没有那么糟糕,JCenter不会立马关闭,JFrog还是预留了一点时间让我们做库迁移的。话虽如此,我们还是要尽早迁移,尤其是做sdk开发的。那么该往哪儿迁移呢?让我们来对比下目前市面上的几大远程仓库:

  • Google 谷歌自用,不给广大开发者使用,还真是小气
  • Jcenter 性能和存储大小有优势,这也是之前google默认使用它的原因
  • mavenCentral 和JCenter齐名,发布流程比较长,对开发者不友好

对比了之后我们别无选择只能迁移到MavenCentral,接下来就来讲一下如何将库发布到MavenCentral。

注册

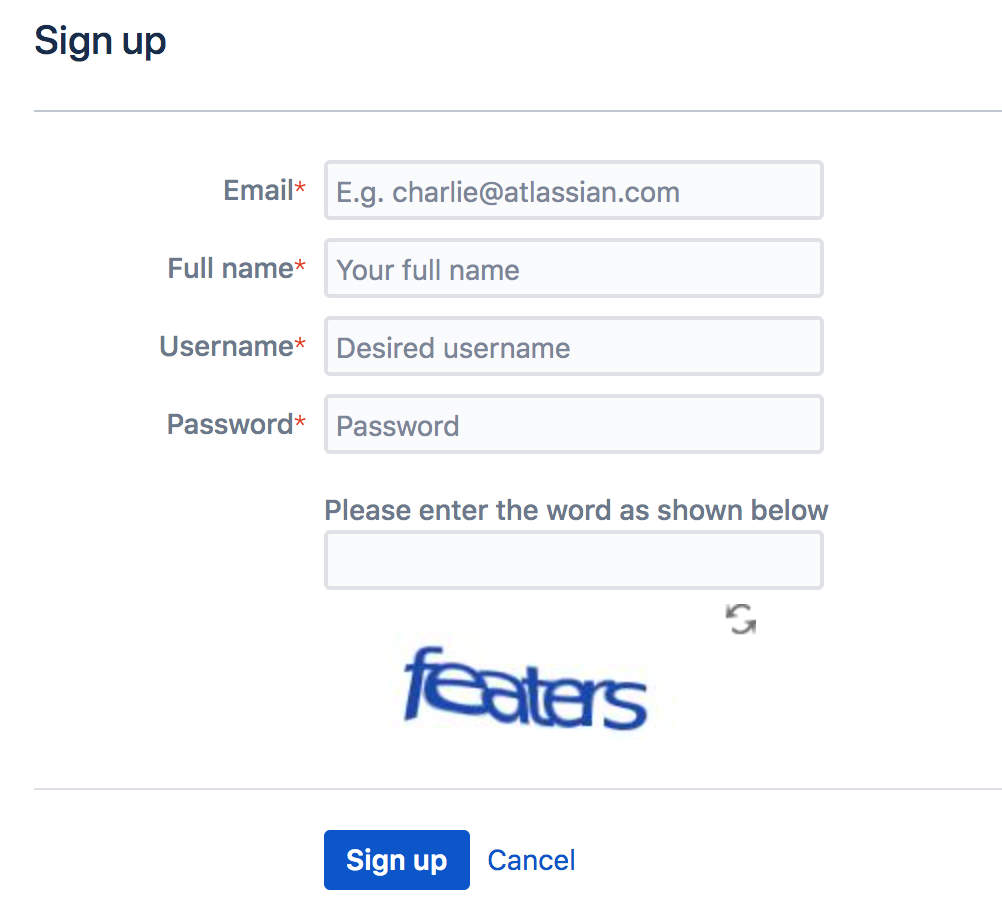
与jCenter是由jForg运营,在bintray.com做管理一样,Maven Central是由sonatype运营的,那么首先需要去注册一个sonatype的账号并获得仓库使用许可。

先前往https://issues.sonatype.org注册账号,界面如图:

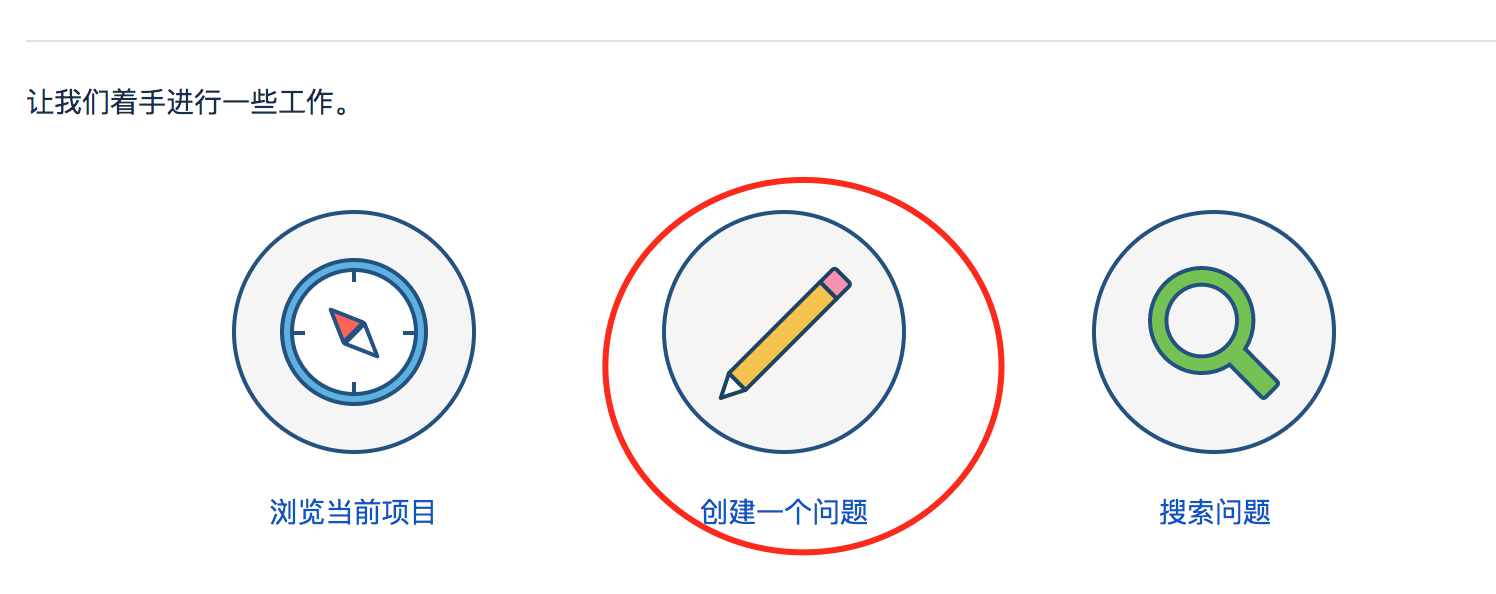
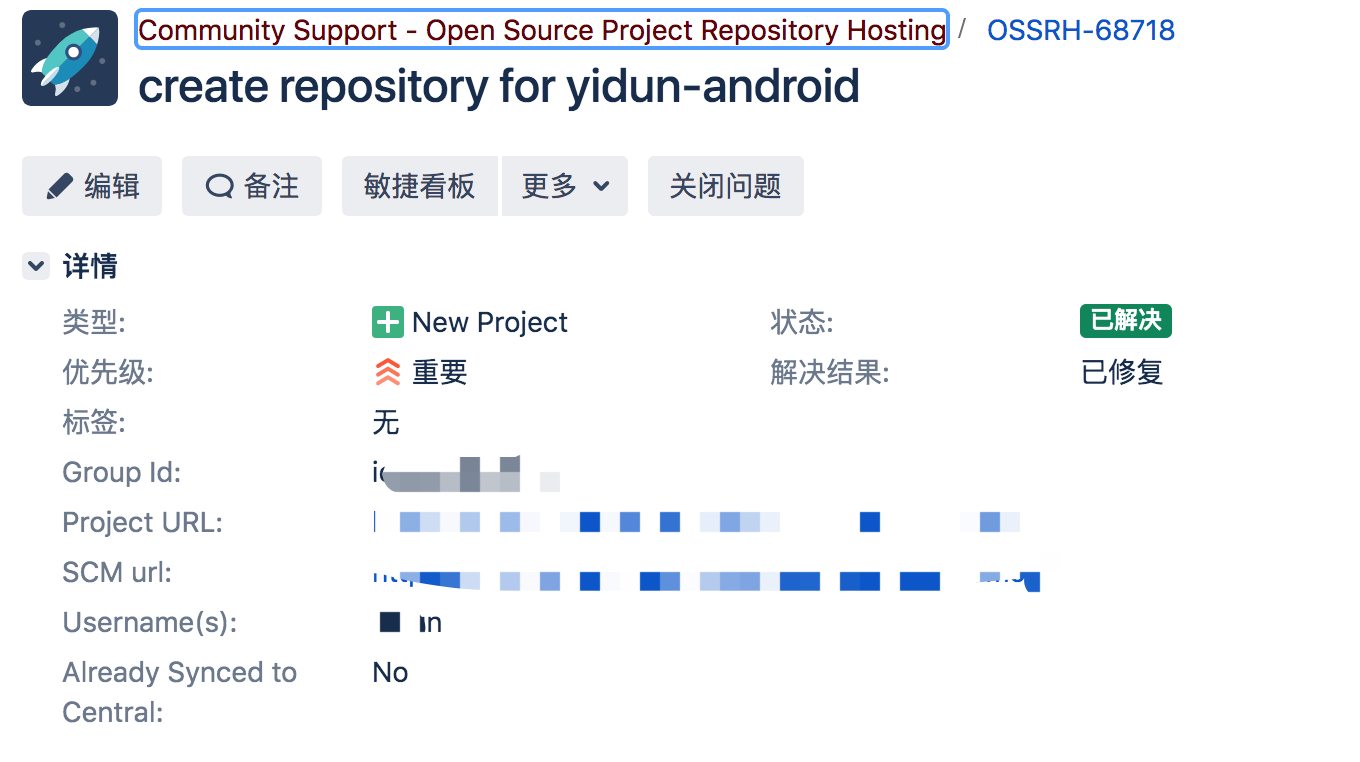
注册完登录进去之后需要提一个Issue,sonatype创建仓库以Issue的形式。

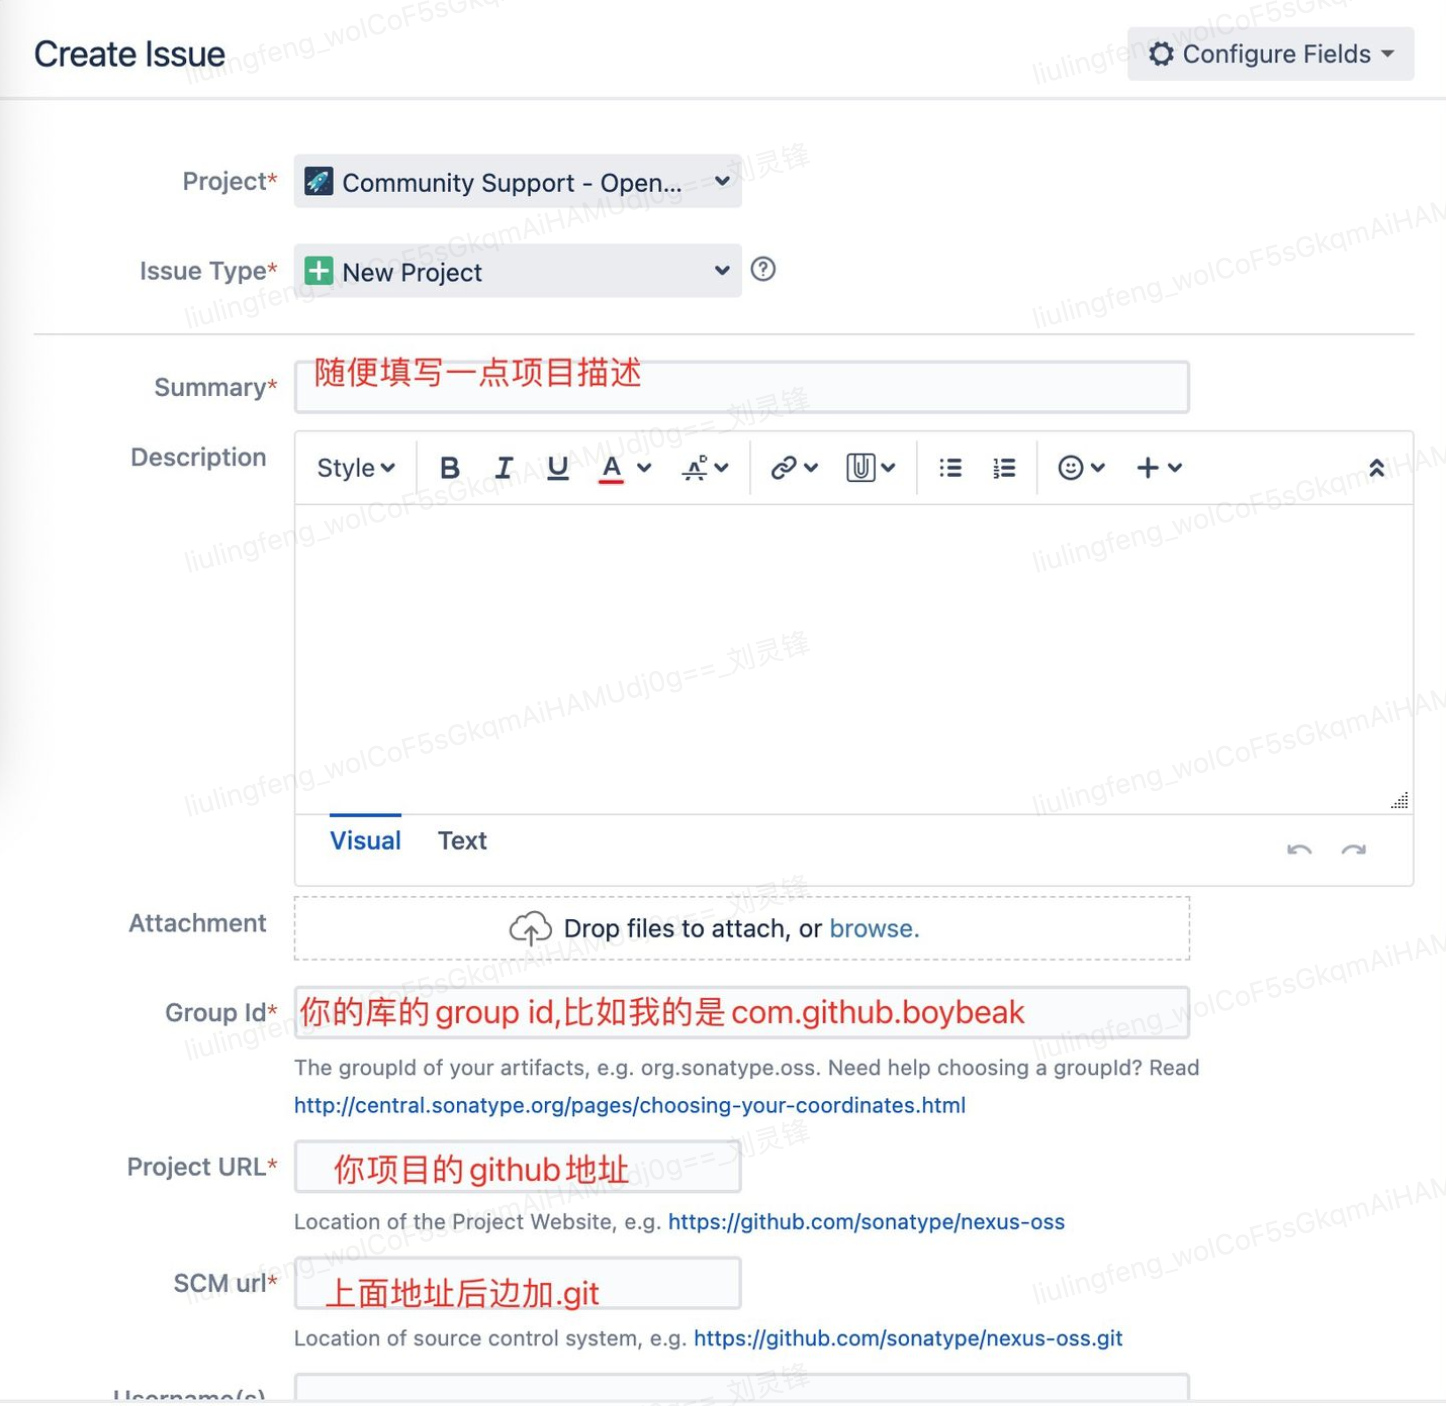
其他按要求填写即可,最重要的是Group Id。之后提交的所有库都是在这个Group Id下,最简单的命名是以io.github开头后跟github的名字,如io.github.liulingfeng。当然也可以按照你的域名翻转作为你的Group Id。两者认证方式不同,以io.github.liulingfeng为Group Id的只需要在github上创建一个public的项目就行;使用自己的域名,需要按照官方的要求,在DNS配置配置一个TXT记录指向你的Github地址来完成验证,比较麻烦,具体参考https://central.sonatype.org/publish/

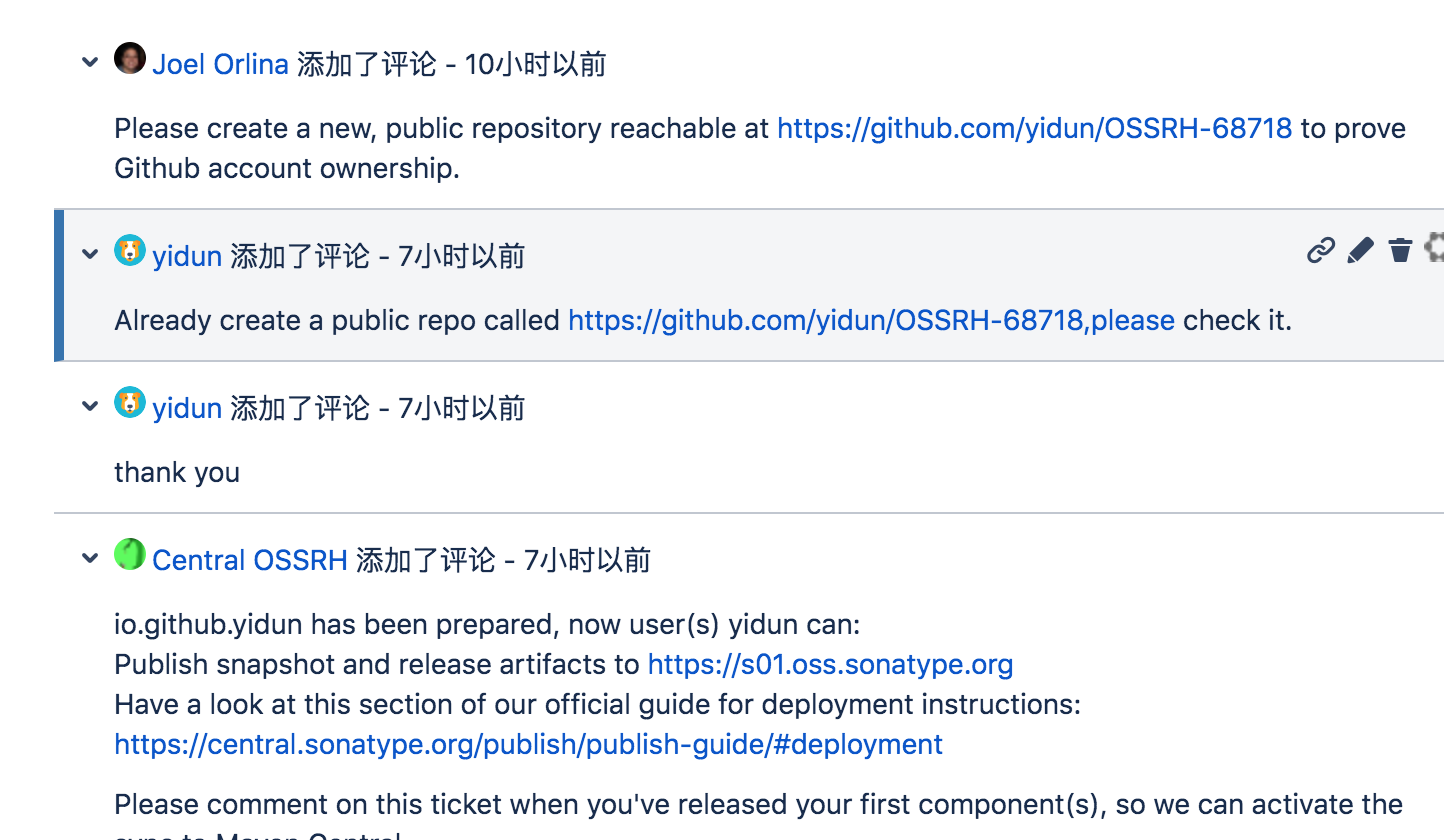
申请后请耐心等待官方的回复,待issues状态变为已解决,那么就说明申请成功了,如果有任何错误,审核人员会在下方给出注释,你也可以通过备注回复审核人员完成申请。

Gradle 配置

首先引入dokka-gradle-plugin插件
1
classpath "org.jetbrains.dokka:dokka-gradle-plugin:1.4.10.2"
在需要发布的Moudle根目录下创建publish.gradle文件
1
2
3
4
5
6
7
8
9
10
11
12
13
14
15
16
17
18
19
20
21
22
23
24
25
26
27
28
29
30
31
32
33
34
35
36
37
38
39
40
41
42
43
44
45
46
47
48
49
50
51
52
53
54
55
56
57
58
59
60
61
62
63
64
65
66
67
68
69
70
71
72
73
74
75
76
77
78
79
80
81
82
83
84
85
86
87
88
89
90
91
92
93
94
95
96
97
98
99
100
101
102
103
104
105
106
107
108
109
110
apply plugin: 'maven-publish'
apply plugin: 'signing'

task androidSourcesJar(type: Jar) {
classifier = 'sources'
}

ext {
PUBLISH_GROUP_ID = 'Group Id'
PUBLISH_ARTIFACT_ID = 'Artifact Id'
PUBLISH_VERSION = '版本号'
}

ext["signing.keyId"] = ''
ext["signing.password"] = ''
ext["signing.secretKeyRingFile"] = ''
ext["ossrhUsername"] = ''
ext["ossrhPassword"] = ''

File secretPropsFile = project.rootProject.file('local.properties')
if (secretPropsFile.exists()) {
println "Found secret props file, loading props"
Properties p = new Properties()
p.load(new FileInputStream(secretPropsFile))
p.each { name, value ->
ext[name] = value
}
} else {
println "No props file, loading env vars"
}
publishing {
publications {
release(MavenPublication) {
// The coordinates of the library, being set from variables that
// we'll set up in a moment
groupId PUBLISH_GROUP_ID
artifactId PUBLISH_ARTIFACT_ID
version PUBLISH_VERSION

// Two artifacts, the `aar` and the sources
artifact("$buildDir/outputs/aar/${project.getName()}-release.aar")
artifact androidSourcesJar

// Self-explanatory metadata for the most part
pom {
name = PUBLISH_ARTIFACT_ID
description = '描述信息'
// If your project has a dedicated site, use its URL here
url = '官网'
licenses {
license {
//协议类型,一般默认Apache License2.0的话不用改:
name = 'The Apache License, Version 2.0'
url = 'http://www.apache.org/licenses/LICENSE-2.0.txt'
}
}
developers {
developer {
id = 'sonatype注册的用户名'
name = 'sonatype注册的用户名'
email = 'sonatype注册的邮箱'
}
}
// Version control info, if you're using GitHub, follow the format as seen here
scm {
//修改成你的Git地址:
connection = 'scm:git:项目git地址'
developerConnection = 'scm:git:项目git ssh地址'
//分支地址:
url = '分支'
}
// A slightly hacky fix so that your POM will include any transitive dependencies
// that your library builds upon
withXml {
def dependenciesNode = asNode().appendNode('dependencies')

project.configurations.implementation.allDependencies.each {
def dependencyNode = dependenciesNode.appendNode('dependency')
dependencyNode.appendNode('groupId', it.group)
dependencyNode.appendNode('artifactId', it.name)
dependencyNode.appendNode('version', it.version)
}
}
}
}
}
repositories {
// The repository to publish to, Sonatype/MavenCentral
maven {
// This is an arbitrary name, you may also use "mavencentral" or
// any other name that's descriptive for you
name = "mavencentral"

def releasesRepoUrl = "https://s01.oss.sonatype.org/service/local/staging/deploy/maven2/"
def snapshotsRepoUrl = "https://s01.oss.sonatype.org/content/repositories/snapshots/"
// You only need this if you want to publish snapshots, otherwise just set the URL
// to the release repo directly
url = version.endsWith('SNAPSHOT') ? snapshotsRepoUrl : releasesRepoUrl

// The username and password we've fetched earlier
credentials {
username ossrhUsername
password ossrhPassword
}
}
}
}
signing {
sign publishing.publications
}
在需要发布的Moudle的build.gradle中添加对publish.gradle的依赖
1
apply from: "./publish.gradle"
创建GPG秘钥(下面是mac教程,windows自行查找)
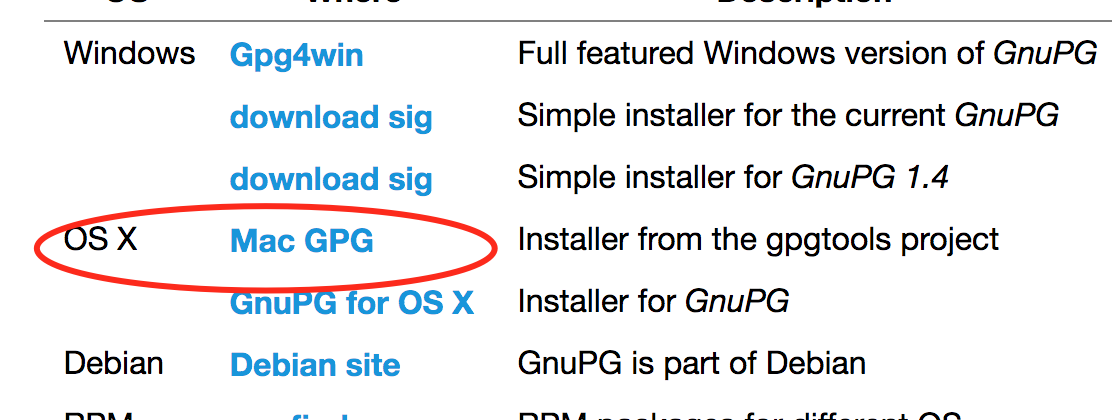
  1. https://www.gnupg.org/download/下载GPG客户端

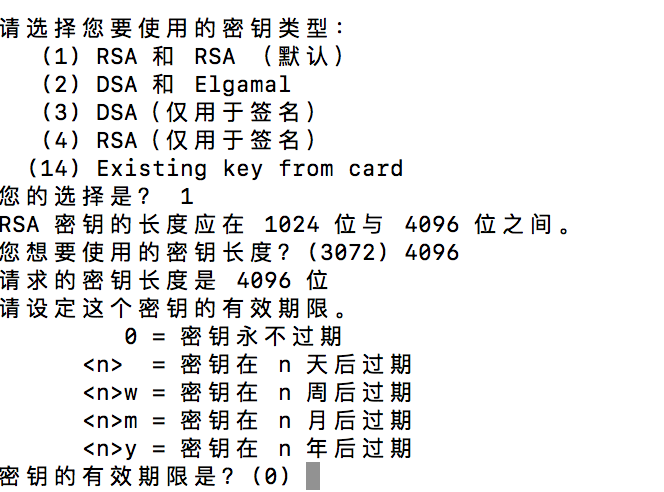
  2. 在命令行中执行命令gpg –full-gen-key

  3. 加密方式选择RSA and RSA,长度输入4096,过期时间直接回车不用管,然后输入一个user ID并且提供一个邮箱,我直接用的我sonatype的用户名和邮箱。最后一步输入’O’,表示OK

  1. 之后会弹出一个对话框,让输入密码。这会为你在~/.gnupg/openpgp-revocs.d/目录下创建一个.rev文件,记住pub的末尾8位
  2. 创建secring.gpg文件,命令行执行gpg –export-secret-keys -o secring.gpg,这会要求你输入在步骤4中设置的密码,在你用户根目录下会出现secring.gpg文件
  3. 回到gpg客户端,选择我们刚生成的秘钥条目,右键,选择Send Public Key to Key Server
    在local.properties添加如下配置
    1
    2
    3
    4
    5
    signing.keyId=刚才生成的.rev文件秘钥后8
    signing.password=步骤4中设置的密码
    signing.secretKeyRingFile=刚才生成的secring.gpg文件目录
    ossrhUsername=sonatype用户名
    ossrhPassword=sonatype密码
    执行打包发布
    设置完这些后,在AndroidStudio右侧的gradle tasks中找到你想提交的module,先执行build生成产物

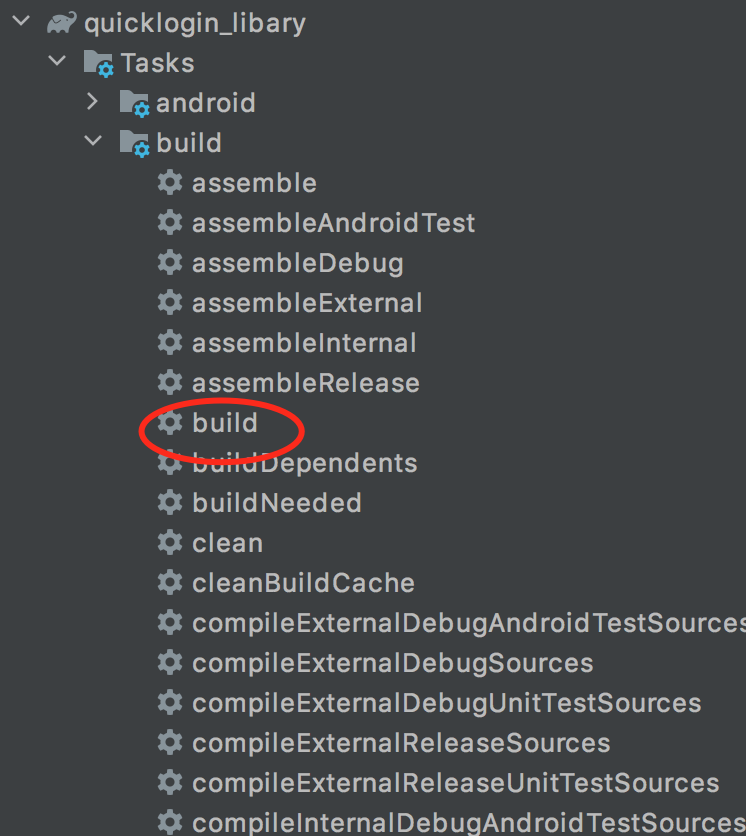
接着执行generatePomFileForReleasePublication生成pom文件

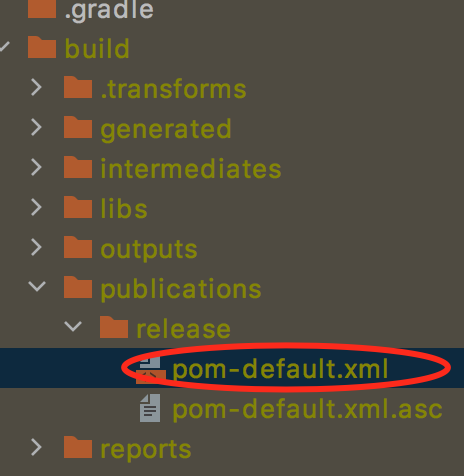
生成的pom文件在如图所示的位置,最好查看下生成的pom文件是否正确。pom文件直接影响到整个gradle依赖。

)

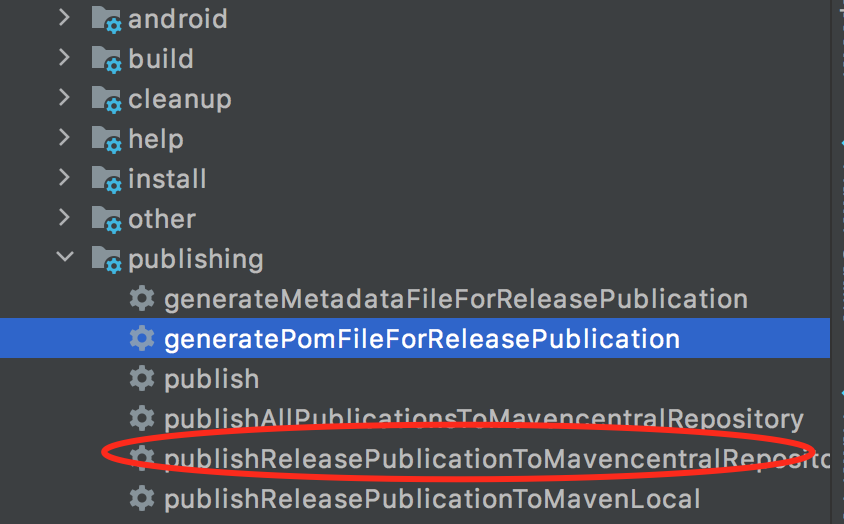
最后执行publishReleasePublicationToMavencentralRepository发布
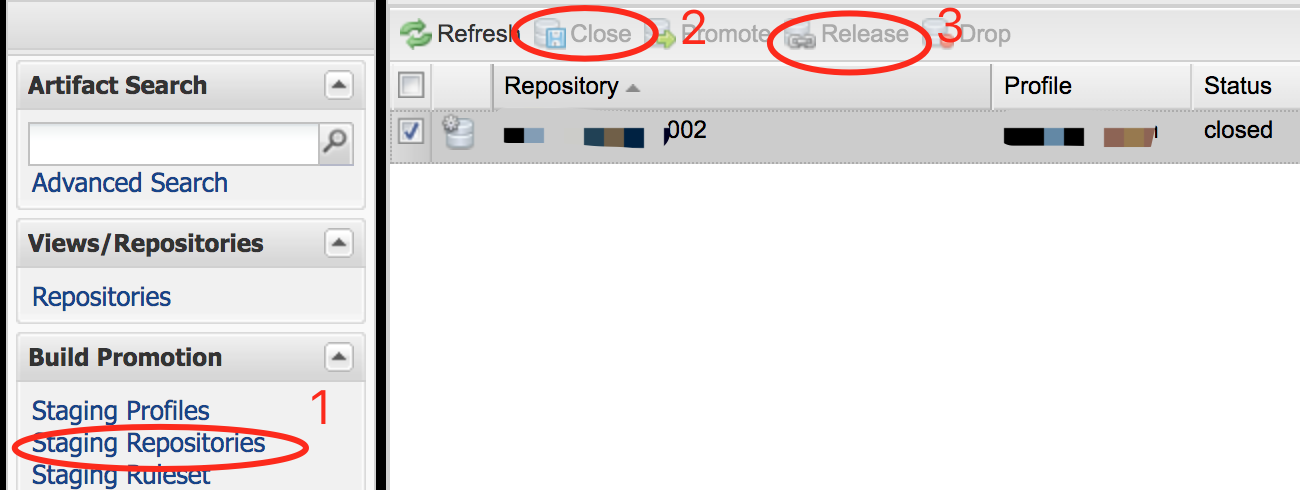
设置为所有人可见

上传成功后,打开https://s01.oss.sonatype.org/#welcome,登录你的sonatype账号,在左侧Staging Repositories页面找到你的group id,点击上边的close,等待几分钟十几分钟后刷新状态。等其状态变为closed后,再点击Release,则所有人都能使用你的库了。

问题

问题1

理论上执行完上述流程之后远程依赖就可以正常使用了。神奇的是后面的某次发布过程中遇到了问题,设置完Release之后在Public Repository已经可以搜索到刚发布完的库。但是拉取远程依赖的时候死活拉不到,提示如下:

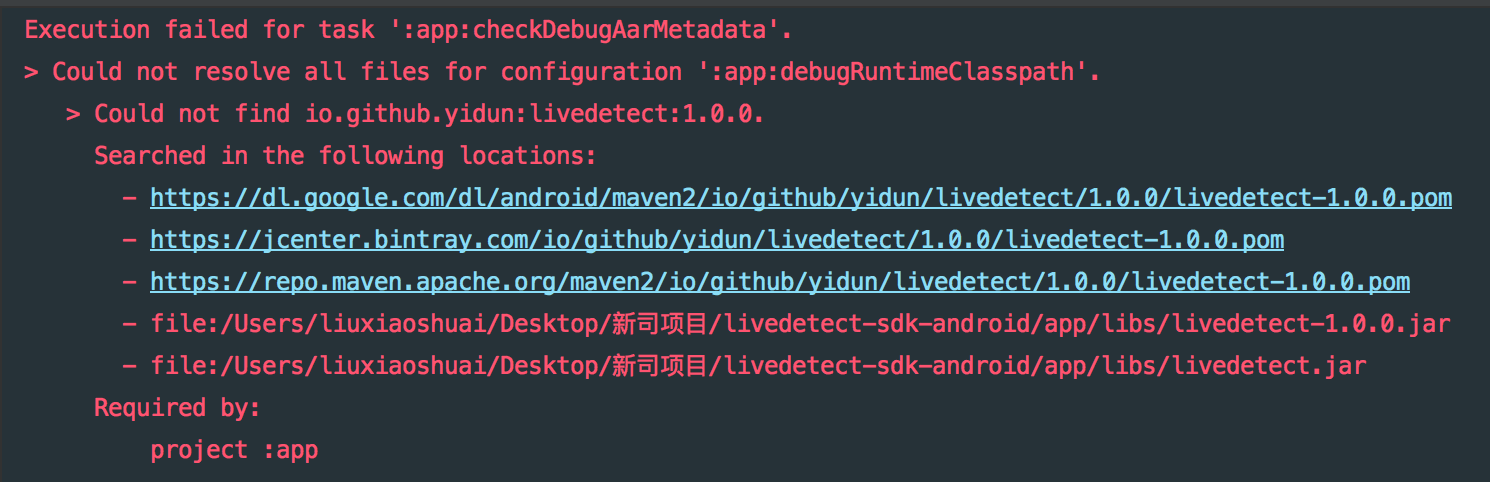
我们知道远程依赖会从配置的中央仓库遍历去查找,最后一个地址就是mavenCentral对应的中央仓库,点进去提示是404。而其他之前发布成功的依赖能找到,这就非常神奇,我们有必要来重新梳理一下整个发布流程:

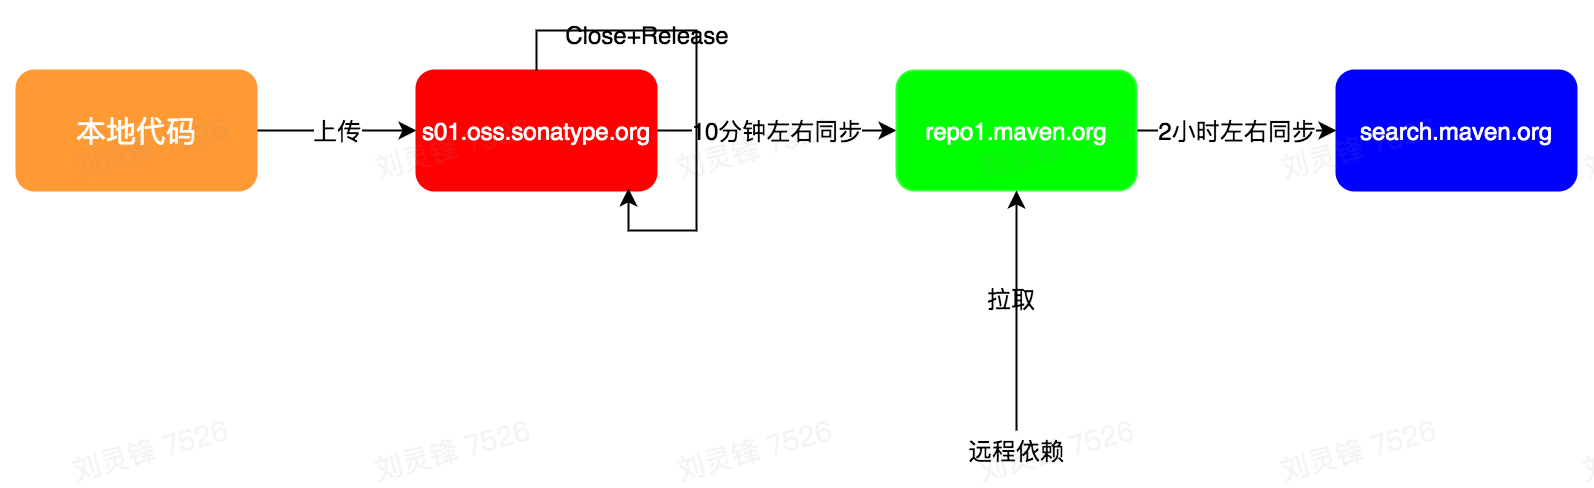
后面两步是自动同步的,不需要我们操心。但就是自动同步出了问题,没有自动同步过去。实在没有办法,只好去sonatype提issue,这时候蹩脚的英语又派上了用场。

原来是同步基础架构中的磁盘空间出了问题,真是虚惊一场。后面遇到什么发布问题都可以在sonatype提issue得到解决,注意老外的时差问题,尽量在老外上班时间提。

问题2

拉远程依赖的时候出现如下图所示的异常:

怎么会出现 Could not find :unspecified 呢?其实问题的关键在生成的pom文件中:

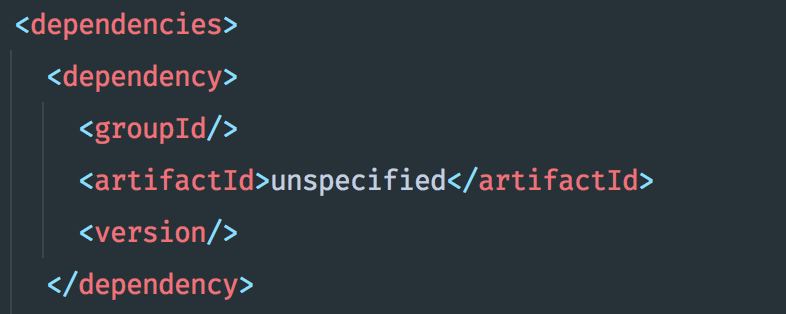
由于项目的依赖中有一项是本地jar依赖,所以会读不到group、name和version,值自然就是unspecified。读取的时候由于无法识别就报出了上述问题。解决方案也很简单,就是withXml的时候做一下过滤:

1
2
3
4
5
6
7
8
9
10
11
12
withXml {
def dependenciesNode = asNode().appendNode('dependencies')

project.configurations.implementation.allDependencies.each {
if (it.name != 'unspecified') {
def dependencyNode = dependenciesNode.appendNode('dependency')
dependencyNode.appendNode('groupId', it.group)
dependencyNode.appendNode('artifactId', it.name)
dependencyNode.appendNode('version', it.version)
}
}
}

哪个值是unspecified,就对哪个值做个判断,当然全加上更保险。